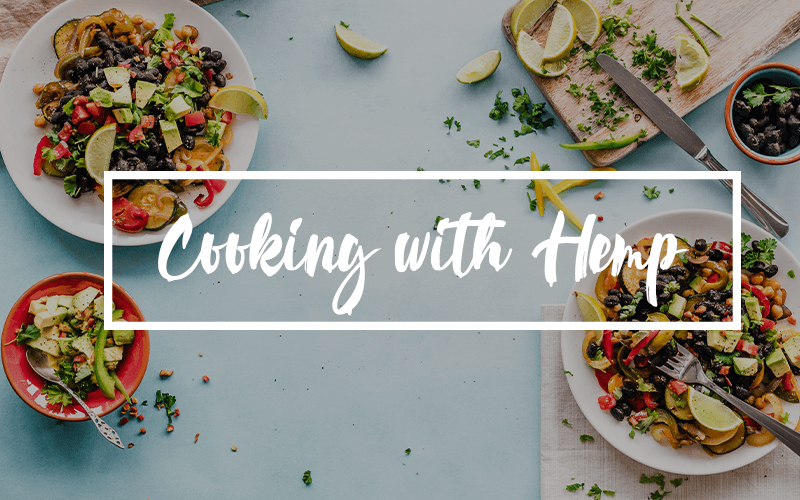
Cooking with Hemp: A few things worth knowing
It’s good to know how much CBD is in what you’re making. However, there are a lot of variables: the quality of your hemp, your oven temperature, your preparation methods, and more.
Most of us are used to Western medicine, where everything is measured in exact milligrams, but you are infusing different mediums (fats, alcohol, glycerin) with natural plant material, so dosing needs to be approached differently.
Cooking with hemp is very much about learning what works for you. The effect you get from what you cook depends on the strain, how it was prepared, and the amount ingested, as well as other variables, so be aware and listen to your body.
Of course, one of the glorious things about using CBD is that it truly can’t hurt you. Unlike opioids, CBD doesn’t affect the brain stem, and there is no psychoactive effect; humans can’t overdose on CBD. To give you a good general idea, estimate 50 to 70 milligrams of CBD per gram of hemp material.
So, if you have 1 ounce (28 grams) of hemp after you decarboxylate it, you’ll have anywhere from 1,400 to 1,960 milligrams of CBD and other cannabinoids available in that 1 ounce of hemp.
1 gram of cannabis = 50 to 70 milligrams of CBD
1 ounce (28 grams) of cannabis = 1,400 to 1,960 milligrams of CBD
Again, Cooking with hemp is not about the number of milligrams, it’s how you feel, so pay attention to your body. Use a little more or a little less; experimenting is half the fun!
Decarboxylating Cannabis
To get the maximum benefit from hemp into your food, you need to decarboxylate, or gently heat, the plant material first. “Decarbing” transforms the cannabinoid acids into bio-available cannabinoids, which means more CBD and other good stuff for you. After cannabis is decarbed, it’s ready to be infused into butter or oil infused into tinctures or made into flour for the CBD to be truly bio-available.
There are charts available online to show you different decarboxylation times for different benefits, but when learning the basics, decarbing for 30 minutes at 225°F is a good general rule. As heat can degrade the effectiveness of cannabinoids, make sure not to bake at too high a heat or for too long.
Decarboxylated cannabis (CBD flour)
Nothing could be simpler than making your own CBD flour, or finely ground decarboxylated cannabis. The key to this preparation is making sure the flour is completely dry, as mold can be an issue.
If using in place of wheat (or other) flour, the most important thing to remember is quantity: Because of the extremely strong flavor of cannabis and lack of gluten, you don’t want to substitute more than one-quarter of your flour with CBD flour. Also, using CBD flour will give you a lot of CBD, so you probably won’t need to use CBD butter, honey, or other CBD products in your CBD flour preparation. Play with it and see what works for you.
For plant material, cannabis “bud” is preferred, but if “shake” is all that’s available, figure that the flour made from it has about half the amount of CBD as that made from bud.
Whatever you’re using the decarbed hemp for, the method is the same.
Spread your plant material on a baking sheet and cover with foil. Place in a low oven, around 225°F, for 30 to 40 minutes. Remove from the oven, uncover, and let cool completely. It is now ready to be used to make the other products you will see in the coming pages.
A Different Decarbing Method
I don’t teach this in my classes because it can take several days, but if you really want to smooth out the taste and enjoy a less vegetal flavor in your CBD products, this is a good way to go. In this method, you wash out some of the chlorophyll, so your product will taste less like the lawn.
Big pan or sink full of warm water (not over 115°F)
Immerse your hemp in the warm water for 3 to 4 minutes. Then take it out and spread it on baking sheets to dry, away from heat and light. This should take several days. (Do not pop this in the oven to dry, as you’ll have cooked off all of the CBD by the time it is dry!) Make sure it’s absolutely dried out and that it hasn’t grown mold.
Spread your plant material on a baking sheet and cover with foil. Place in a low oven, around 225°F, for 30 to 40 minutes. Remove from the oven, uncover, and let cool completely. It is now ready to be used to make flour and other products.
Fat extractions: butter and oil
CBD needs fat, alcohol, or glycerin to be bio-available. Butter, oil, and other fats like ghee, lard, and solid coconut oil can be infused with decarbed hemp for cooking, baking, and many other uses. A good rule when making CBD butter or CBD oil is a 1:1 ratio. In other words, 1-ounce CBD Flour to 1-pound unsalted butter or 16 ounces of oil.
Tip: Don’t ever let your fat extractions boil—high temperatures will cook off the CBD. I always recommend storing these in glass in the fridge; plastic can leach out cannabinoids.
Making CBD Butter or Oil
It’s important to cook these products gently for the best results. If the mixture gets dark brown, or if you find that your CBD products aren’t working, the heat was too high and/or you cooked it too long.
What you need
1-ounce CBD Flour
1 pound (4 sticks) unsalted butter or 16 ounces (2 cups) of olive, coconut, vegetable, or other oil of your choice
Place the flour and butter or oil at the top of a double boiler with barely simmering water below. Cook for 4 to 5 hours, making sure the mixture is barely bubbling, and stir often. Do not cook less than 4 hours or longer than 5 hours; this will affect the effectiveness of the CBD. (Check the simmering water occasionally and replenish as needed.) Strain the butter through a cheesecloth-lined sieve into a glass container and refrigerate. It is now ready to use. The butter will keep for up to a month in the fridge.
Note
You can also use your slow cooker. Add 1 cup of water to the hemp mixture and cook on the low setting. Cook for 4 to 5 hours, making sure the mixture is barely bubbling, and stir often. Do not cook longer than 5 hours. Strain the butter through a cheesecloth-lined sieve into a glass container and refrigerate till the fat is solid. Lift-off the fat, discard the water, and it is ready to use. Store in a glass container in the fridge for up to a month.
Tinctures: glycerin and alcohol
Tincture, a liquid delivery system, is an effective (and somewhat underrated) way to get your medicine. Tinctures are usually made with strong alcohol or mild glycerin; the person using it and what it’s being used for will determine the extraction method.
Taken sublingually, or absorbed under the tongue, the effects of tinctures happen faster than with other edibles, but the effects don’t last quite as long, so this is often a good way to medicate. Taken in a beverage, the effects take a bit longer to kick in, as the medicine has to go through your digestive system. It is important to always store tinctures in the fridge, in glass if possible, so they remain potent. Whichever method you end up using, I’m sure you’ll love the ease of use and efficiency of tinctures.
Hemp Seed Milk Recipe
Ingredients
1 cup hemp seeds, shelled
5-6 cups purified or filtered water
Natural sweetener such as up to 2 Tbsp. or raw honey, raw coconut sugar or pure maple syrup Or 4 pitted dates, soaked
Optional Ingredients
1 tsp natural organic vanilla extract, optional
1 Tbsp. non-GMO lecithin, optional
1 Tbsp. virgin coconut oil, optional
Pinch of Himalayan salt, optional
Instructions
Place all ingredients into your NutriBullet Tall cup or your Vitamix or similar high powered blender (You can use a KitchenAid or Cuisinart hand mixer too).
Please note that the optional lecithin and coconut oil will add a richer and creamier product.
The dates, raw honey, raw coconut sugar, or maple syrup will add a sweeter taste and the vanilla extract will also aid in resembling the store-bought, without any additives.
Consume unstrained for the most nutritional benefits, however, you can strain in a nut bag for a smoother consistency. Nut milk bags are available at most health food stores such as online at Truly Organic Foods.
If you do choose to strain the pulp, save it for use in cookies, pancakes, or other baking.
This mild hemp seed pulp can be added to ½ cup of fresh blueberries, one banana, and a dash of cinnamon and blended for a delicious smoothie for two.
Vishal Vivek
Vishal Vivek is the Founder and CEO of Ukhi, a pioneering bio-materials company dedicated to ending plastic pollution by converting agricultural waste into high-performance compostable polymers. With a background in sustainable entrepreneurship and over a decade of technology experience, he leads Ukhi’s vision to create scalable, planet-positive material solutions. Previously, Vishal founded the Hemp Foundation, where he empowered more than 1,000 farmers and advanced sustainable livelihood initiatives. His work has been recognized through awards such as the HDFC Parivartan Grant and featured in leading publications like Forbes and Entrepreneur. Times Group recognized him as a legendary entrepreneur and published his biography in “I Did IT- Vol 2” alongside social pioneers like Bindeshwar Pathak (Sulabh International) and Anshu Gupta (Goonj). Vishal has authored more than 200 articles on sustainability and hemp, reflecting his deep expertise and advocacy for regenerative solutions. His commitment to grassroots impact led him to live in the remote mountains of Uttarakhand, where he immersed himself in the lives of marginal farmers, understanding their challenges and co-creating economic opportunities through hemp-based initiatives. A deeply passionate innovator, Vishal often draws inspiration from seemingly impossible achievements: “If Elon Musk can make rockets reusable, or Dashrath Manjhi can carve a path through a mountain with rudimentary tools, why can’t we eliminate the demon of single-use plastic while uplifting struggling farmers? We will make it happen—whatever it takes.” Ukhi is proud to be supported by premier institutions including IIT Guwahati, NSRCEL-IIM Bangalore, Indian School of Business (Hyderabad), Indian Council of Agricultural Research (ICAR Pusa), and the Indian Institute of Packaging. Vishal is committed to demonstrating that business can be a powerful catalyst for global environmental and social good. Connect with Vishal Vivek
Related Posts
How Can Hemp Mitigate The Perils of eCommerce Plastic Packaging?
[vc_row][vc_column][vc_column_text] Your online orders are damaging the planet. The plastic packagin

7 Facts About Hemp’s Role in Cutting Carbon
In January 2025, the World Meteorological Organization confirmed what many of us had felt last yea
Is Hemp Plastic Food Safe? Facts for Everyday Use
Every time a new packaging material enters the market, the first question isn’t about how green it
